Saturday, November 22, 2008

Mushroom Quiche

Baking a quiche was on my to-do list for quite sometime. I even got my Mom to get me a pie dish (ones with removable bases and fluted sides) - but somehow I was not getting time and motivation enough to bake one. But I had planned it out this week to bake a mushroom quiche this weekend - so right after coming back from office on Friday evening, the 1st task I did was knead the dough for the pie shell. I did lots of blog surfing before I started on my task, and some of the blogposts I read were http://www.elise.com/recipes/archives/001753mushroom_quiche.php and http://happyhomebaking.blogspot.com/2007/12/mushroom-pie.html.

I was quite concerned about getting it right, since all the blogs seemed to tell me that its difficult to get it right the 1st time. How I got the pie shell is here:

1 cup flour + 1 tsp salt
~ 100 g cold white butter (I grated this into the flour)
3-4 tbsp ice cold water
I took care to use all ingredients which were cold and also not to knead the dough a lot. As soon as the dough stuck together, I stopped the kneading and packed it in a ziploc bag and put it in the fridge (not the freezer).

This evening, I simply rolled out the dough, then realized that my pie dish is ~ 12 inches, so my dough will not be enough for it:( So ultimately I used the smallest baking disk I have, and lined it with Al foil, which I kept longer than the edges of the dish. After carefully placing the dough in the lined dish, I punctured holes in the base of the shell and baked it for 10 mins at 190C. I did not use beans to weigh down the pie dough to prevent it from rising, but kept small steel dish on top;)

For the filling, I sauted some sliced button mushrooms and finely chopped shallots in olive oil. This I seasoned with salt, pepper, marjoram and dried italian herb mix. I then grated 2 cubes of cheddar cheese on the base of the pie shell, put the mushrooms on top, grated some more cheese on top and poured egg mixture (beat 2 eggs + 1/4 cup milk + 1/4 cup thick cream + salt/pepper) on it. I then placed the dish in a preheated oven and baked it for 25 mins at 190C.

I am quite a happy (and relieved) person after trying out this dish:) This was weighing onmy mind for quite sometime. I really liked the outcome (dont the pics speak for themselves?), and so did my hubby. We had initially decided to eat a couple of slices with evening tea on Saturday and spare a few for Sunday b'fast - but as you can very well realise, we polished up the entire quiche in the evening itself:) My hubby has already planned on making a chicken version of this quiche very soon - and I wait for his
trial.


Friday, November 21, 2008

Super Eggless Yoghurt Cake

Last week, I had an appointment with my Doctor in Mumbai, so we planned to stay with our friends Prateek and his new wife Shivangi for the weekend. Since S is a vegetarian, I baked an eggless cake for her. My previous eggless cake experiement was not very successful, so I called up Mom to pass me one of her yoghurt cake recipes. The ones with 'Milkmaid" somehow turn out very dry for my taste.
I have to accept that the cake turned out very well...appreciated by all who had a piece out of it, including my colleagues in office as well as my hubby's colleagues! Most had assumed that the cake had been bought from a bakery shop!! I guess, this was one of the biggest compliments that I have received as yet.
I am sorry - but I did not click any pics of the cake..but it turned out nicely moist, dense and dark chocolaty brown (obviously bcoz of all the cocoa powder).
I did lots of approximations during the measurements, since I was in a hurry. Also, since we were packing for our short weekend getaway, I wrote it hurriedly someplace I dont remember now:) Some of the approx measurements that I do remember are:
1. 1 1/2 cup plain flour or maida (my cup was 200 ml)
2. 1/2 cup or slightly less cocoa powder
3. 1 small container of amul dahi or yoghurt (I think - 200 g pack)
4. 3/4 cup powdered sugar
5. 1/2 cup refined vegetabel oil
6. 1 1/2 tsp baking powder and 1/2 tsp baking powder
Process -
1. Sift the dry ingredients together
2. Mix curd and sugar together, and to this mixture. add the flour mixture and curd alternately. Also pour in the oil slowly and mix with the hand-held whisk. I just used up one mixing bowl and one whisk to prepare the batter...wasnt that cool!:)
3. The batter turned out slightly thick..Mom had asked me to add a few tbps of milk if the batter was not in pouring consistency, but then I was not in a very patient mood, so I simply dumped the thickish batter into the greased/dusted 9" round baking dish. I baked this initially at 220 degress for 10 mins and then lowered the tenmperature to 180 for the other 20 mins.

I will be making this cake again very soon..since not only was it super-easy to bake, super-dense and moist to eat, but also because it is quite healthy, with no eggs and minimal oil. Just take care of the quality of curd you use for the cake - I purposefully did not use home-made curd for this,since I wanted to thick creamy curd to give the cake its moistness.


Tuesday, September 30, 2008

The Omnivore’s Hundred

well...since i've not yet blogged about my recent recipes, but am listing the The VGT Omnivore’s Hundred list (from http://www.verygoodtaste.co.uk/uncategorised/the-omnivores-hundred/), you can very well understand that I enjoy reading blogs more than writing myself:)

anyways, as asked by the UK bloggers, I will copy the list of 100 things that they think every good omnivore should have tried at least once in their life. The list includes fine food, strange food, everyday food and even some pretty bad food - but a good omnivore should really try it all. The instructions are quite explicit...
1) Copy this list into your blog or journal, including these instructions.
2) Bold all the items you’ve eaten.
3) Cross out any items that you would never consider eating.
4) Optional extra: Post a comment here at www.verygoodtaste.co.uk linking to your results.

The VGT Omnivore’s Hundred:
1. Venison
2. Nettle tea
3. Huevos rancheros
4. Steak tartare
5. Crocodile
6. Black pudding
7. Cheese fondue
8. Carp
9. Borscht
10. Baba ghanoush
11. Calamari
12. Pho
13. PB&J sandwich
14. Aloo gobi
15. Hot dog from a street cart
16. Epoisses
17. Black truffle
18. Fruit wine made from something other than grapes
19. Steamed pork buns
20. Pistachio ice cream
21. Heirloom tomatoes
22. Fresh wild berries
23. Foie gras
24. Rice and beans
25. Brawn, or head cheese
26. Raw Scotch Bonnet pepper
27. Dulce de leche
28. Oysters
29. Baklava
30. Bagna cauda
31. Wasabi peas
32. Clam chowder in a sourdough bowl
33. Salted lassi
34. Sauerkraut
35. Root beer float
36. Cognac with a fat cigar
37. Clotted cream tea
38. Vodka jelly/Jell-O
39. Gumbo
40. Oxtail
41. Curried goat
42. Whole insects
43. Phaal
44. Goat’s milk
45. Malt whisky from a bottle worth £60/$120 or more
46. Fugu
47. Chicken tikka masala
48. Eel
49. Krispy Kreme original glazed doughnut
50. Sea urchin
51. Prickly pear
52. Umeboshi
53. Abalone
54. Paneer
55. McDonald’s Big Mac Meal
56. Spaetzle
57. Dirty gin martini
58. Beer above 8% ABV
59. Poutine
60. Carob chips
61. S’mores
62. Sweetbreads
63. Kaolin
64. Currywurst
65. Durian
66. Frogs’ legs
67. Beignets, churros, elephant ears or funnel cake
68. Haggis
69. Fried plantain
70. Chitterlings, or andouillette
71. Gazpacho
72. Caviar and blini
73. Louche absinthe
74. Gjetost, or brunost
75. Roadkill
76. Baijiu
77. Hostess Fruit Pie
78. Snail
79. Lapsang souchong
80. Bellini
81. Tom yum
82. Eggs Benedict
83. Pocky
84. Tasting menu at a three-Michelin-star restaurant.
85. Kobe beef
86. Hare
87. Goulash
88. Flowers
89. Horse
90. Criollo chocolate
91. Spam
92. Soft shell crab
93. Rose harissa
94. Catfish
95. Mole poblano
96. Bagel and lox
97. Lobster Thermidor
98. Polenta
99. Jamaican Blue Mountain coffee
100. Snake
So! this is it! The verdict is out. I have failed the examination with a measly score of 21/100:(
I guess, it calls for me becoming more experimental in my foodie eatout sessions from today onwards.

Monday, September 22, 2008

Apologies for my inactivity

I am aware that I had promised to be more active on my blog..a promise which I broke within a month's time..but then I know many of you would commiserate with me that it is more fun to read other peoples blogs than to make the effort of writing one oneself:)

But, worry not - I will try to make amends. Last few weeks did not provide me with much online time, what with many relatives over, both of us traveling, planning and arranging long-pending dinners and lunches...yes! I did cook quite a bit in the last 6 weeks. When Annu was here for a fortnight, we also baked many a cakes - I have taken pics of most of these ...will write a post on each as soon as I convince myself to download all the pics from the camera:)

I was visiting my folks recently after they came back from NYC, and they were sweet enough to carry a few baking stuff that I had ordered..a 9" Wilton pie dish, a springform pan and a muffin pan:) I am yet to come across any store here at Pune which has good baking accessories, and since I am right now in a 'baking frenzy', I simply asked my mom to pick these up for me in NYC. I am yet to use these - but I am really excited about making a pie/tart/quiche in my new dish. In his last visit, Annu was really keen on baking a quiche - but we had been limited by the lack of a pie dish. But, Annu - worry not! When you are here next, we will make n number of quiches and tarts as you desire:)

My next few posts will describe the varios cakes I had baked in the last 6 weeks.

Monday, July 14, 2008

Scalloped Chicken in Mushroom & Mustard Sauce

It is soo much fun (and yes touching) when friends and family call up to say that they actually open and read my blog and are looking forward to reading more about our escapades in our tiny kitchen:) I am really touched when Ma and Papa from Udaipur tell me that they regularly read my blog to know whats going on in our life, and when my Mom (the last person I thought would ever become net-savvy and read my blog) from NYC emails to tell me that the blog pics look very nice and that this is a very cool way to not lose good recipes as well as be in touch!! :)

Also, I am soo surprised to learn that people I never knew existed, people outside my circle of friends and family - actually dropped in to read (and comment) about my recipes:) Folks!! this makes me feel soo happy and special:) A big thanks to all who are reading this:)

Yes - I simply cant stop myself from grinning now..but its ok! am sitting all by myself..so no pains:) Now lets get back to business..serious business. Scalloped Chicken Dish recipe. Like I had mentioned in my earlier Fruit Salad post, I had served this simple chicken dish with some Penne in Tomato Sauce for V-dinner.
(Ahh...I am re-writing the post from here on - somehow I was not connected to the internet when I completed and published the post...so I lost all that I'd written in one sitting session:( ..so here it goes..again).
The Chicken: I got these really fresh succulent boneless chicken breasts, which I then cut in thin slices (you can in turn, pound them under a layer of plastic foil with a mallet to get nicely scalloped pieces).These I marinated for a couple of hours in extra-virgin olive oil (EVO), minced garlic, salt, pepper and Worchestershire sauce.
The Sauce: I sauteed some finely diced onions and garlic (can be omitted as well) in some EVO and then a cup of diced fresh mushrooms. To this, I added 2 tbsp of cornflour, and salt, pepper, dry mustard powder and Worchestershire sauce - add water to this, stirring continously till I got a creamy sauce bubbling away in my saucepan:) Ideally, I should have added some chicken/vegetable stock..but then I was too lazy to make that also, so just adjusted the seasonings in the sauce:)
The Assembling: While the sauce is bubbling over the fire, I pan-fried the chicken scallops in EVO over a skillet - this does not take too long and the scallops turn crispy and golden in a few minutes:) I simply placed the scallops on the dinner plate and poured the sauce over them. You can garnish with some finely chopped parsley..we were to hungry to even bother by then:)

Tangy Fruit Salad

I was browsing through the past pictures of our dinner, when I came across this Fruit Salad pic..and felt like sharing this colorful pic with you all:)

Actually this pic is from our V-day dinner that I'd cooked for my hubby dearest. Since we could not go out for our 1st V-day dinner together because of his multiple fractures, he was feeling pretty low and lousy, so had made his favorite pasta dinner for him:) - Penne in Tomato Sauce with Chicken Scallops in Mushroom Mustard Sauce, teamed with a tangy Fruit Salad and some Chocolate Custard.
I just used a few fruits available round the corner in February here, and since Pune is simply run-over with fresh strawberries then, it was the main fruit for the salad. So I simply diced some apples &oranges and added some whole strawberries and cherries, with some ruby red pomegrenate seeds to the salad bowl. For the salad dressing, I mixed some olive oil, fresh lemon juice, salt and pepper with fresh coarsely hand-broken celery leaves and sticks and poured over the fruits. Done! The Salad Bowl was ready in a jiffy:)

Our new baking dish

After the moratorium imposed on me by hubby dearest on baking any more cakes for a while, I was sulking that I was not getting much baking to do..so yesterday he took me to Shopper's Stop for shopping:) and guess what?? We ended up buying a nice 1.5 L borosil baking dish for preparing our pasta dishes:)
Yes..yes..I know it is a bit too big for 2 people, and also our microwave, as well as our OTG (we had to place the dish diagonally to close the oven door), but then both of really liked the rectangular smooth shape:)
So obviously, after buying the dish..both of us rushed back home (on the way picked up a packet of button mushrooms and american sweet corn) and prepared a simple pasta dish for dinner. Our original plan was to use penne rigate for the pasta, but somehow we had runout of it, and I was not too keen on spagetti, so we settled on elbow macaroni to get a dish very similar to the Baked Veggies recipe, only instead of the white bechamel sauce, we prepared this real yummy tomato sauce.
Tomato Sauce: We blanched 4 big red tomatoes in the microwave and then pureed it. In the saucepan, saute some minced garlic and add the puree. Season it with some Worchestershire Sauce, mixed dried herbs, some more oregano mix and salt and pepper. Since we underestimated the volume of our dish, we had used only 3 tomatoes, so then we had to add some thick cream (or milk - your choice) to the sauce - it not only added bulk to the sauce, but also make the pasta smooth and creamy:)
We smothered the pasta-vegetables-pasta layer combo with the sauce and grated some cheddar cheese on top. The cheese gave a very crunchy crust on top, which we completely loved:)

Pasta dinners are fairly common at our place, generally once a fortnight is the norm, but both of us really like baked pasta dishes..it does give something extra to it:) So apart from being nutritious, healthy, simple and non-fussy, it is also soo very delicious!

Tuesday, July 8, 2008

No-fuss Margarita Cake

Had baked this simple no-fuss cake a while ago, since I wanted to try out cakes other than chocolate cakes and also because I like simple flavoured cakes. I had made this small cake in my 5 inch cake tin, and my hubby liked it soo much, that he again pestered me into baking a big one after 3 days. Since we were leaving on a biking trip with a few friends early the next morning, I forgot to take pics of the big square cake - but since I'd packed it for the trip, everybody enjoyed it immensely:)

I followed the recipe from here - though I took all 1/3rd of the measurements listed. Also my cup reference was 180 ml, instead of the usual 250 ml since I used a small egg. For the glaze, I omitted the tequilla and did not cook the glaze much the 1st time. For the bigger cake, I cooked the sugar mixture till it turned quite thick and gooey, but somehow though it looked very nice on the cake, yet biting into it was slightly messy, since the glaze would stick to the teeth:( Next time, I will not overcook the glaze, but leave it slightly runny.
The cake came out very soft and delicately flavoured..my hubby simply loved the idea of grating lime rind/zest into the cake batter:) Also, I had no trouble taking out the cake from the caketin. Overall, this was a great recipe to try - simple, non-messy, quick and delicate lemony flavoured:)

Chocolate Truffle Cake

Baked this lovely chocolate cake last saturday evening on a whim - and it simply turned out great. I am fond of baking cakes which are non-fussy and which do not require me to use all the utensils and gadgets available in my small kitchen. This cake batter was prepared within 15 mins using only a small hand-held manual whisk and a big porcelain bowl:) The top icing was a little fussy - somehow it was a bit too runny for my taste.
Actually I did not have a 8" round baking cake-tin, only a big square tin and a small (hardly 5") round tin. Somehow my cakes in the square tin always were cracking on the top, so this weekend, we bought our new 8" round cake -tin:) I have described the recipe below, which I had longtime back written down from somewhere I dont remember now.

Ingredients for the Chocolate Cake
# 3/4 cup flour (maida) - my base cup is 250 ml here for reference
# 2/3 cup cocoa powder
# 4 eggs
# 1/2 cup vegetable oil
# 3/4 cup powdered sugar
# 1 1/2 tsp baking powder, 1/2 tsp baking soda
# 1/4 tsp vanilla essence
Method:
1. Sift the flour, cocoa, baking powder and baking soda together and keep aside.
2. Beat sugar and eggs in a big bowl till very frothy. Add the vanilla essence. Gradually add oil while beating the mixture lightly. Slowly fold in the flour mixture in this egg-oil mixture. Do not over-beat. The batter is done!!:)
3. Meanwhile, have a 8 inch round cake tin greased and dusted, and preheat the oven at 150 C. Pour the cake batter in the tin and bake for 30-40 mins till a toothpick inserted in the centre of the cake comes out clean. Let the cake cool a while, before removing from the tin. My cake turned out simply divine - soft, fluffy, with no cracks and an uniform dome with nearly 2 inch thickness.

Ingredients for Middle Icing
# 75 g softened white butter
# 1/2 cup sifted icing sugar
# 2 tbsp cocoa powder
# 1 tsp vanilla/brandy/rum essence

Method: Beat the white butter till soft and creamy, then add in the icing sugar - beating well till it turns fluffy. Add the cocoa powder to the get the desired colour - preferably lighter shade than the cake. Keep this icing in the fridge for a while. Meanwhile, cut the cool cake into two parts (We used a string, or you can also use a big flat knife). Soak both the parts of the cake with some sweet aromatic liquid (we used water+sugar+essence, or alternately you can also use coke or milk instead of water). Spread the icing on the lower half of the cake using a spatula and cover it with the top half.
Ingredients for Chocolate Icing for top
# 1 tbsp white butter
# 1 big dark chocolate slab - 80-90 g
# 1/2 cup icing sugar
# 2 tbsp water
# 1 egg
Method: Boil the water in a small saucepan and break the cocolate slab in small pieces and put it in the sauce pan for melting. Keep stirring it all the time, on low heat and when completely melted, add the butter and stir. Remove from heat and add the icing sugar - mixing all the time for it to dissolve completely. Break an egg into this and immediately stir vigorouly and cook on low heat. Stir continously, till you get a thick smooth pouring consistency. Do not let this mixture boil. Somehow, we had to cook this icing for a longtime, and then refrigerate it for 5-10 mins to get a nioce thick icing. Just pour this over the cake - it will flow on its own and cover the cake completely. Decorate the cake as you wish - we simply threw a handful of cadbury gems on it, to make it vibrant and colorful:) Refrigerate the cake for a couple of hours to set the icing completely.
As you can imagine - this is a huge cake between the two of us - so we've been hogging on it for the last 2-3 days:) Now that people have started complimenting my hubby on his new-found paunch, he has strictly prohibited me from baking any more cakes this month:(, so I guess, now I will have to fish out pics of earlier taken food and put them on my blog. Tho' the good part is that I get to finish off the rest of the cake today and lick the crumbs off the plate, since he is on a "strict diet" since this morning;)

Thursday, July 3, 2008

Banana Chocolate Cake

I am not too fond of bananas, but my hubby always assures me that he simply adores them. So whenever I feel like indulging him ;), I buy a few bananas for him. As it so happens, he has never ever (in our 7 months of marriage) finished off all the bananas - which means that I've to see atleast a couple rot before my own eyes. So when I was reading this blogpost by "happyhomebaker" as a great way to use up over-ripe bananas, I simply shouted out with joy:) You see - there were again a couple of these over-ripe bananas sitting on my 'fridge top, which I knew none of us would eat, and I simply HATE having to throw away good food stuff. So I promptly set about to bake this cake - and I must say, that I was simply thrilled with the outcome. Firstly, it was soo simple to prepare the batter (unlike a few cakes - this required only one big mixing bowl) and since I dont have a food processor or blender, the batter required only brisk whisking with hand. Also, the cake came out soft and moist (am not too fond of dry cakes). 
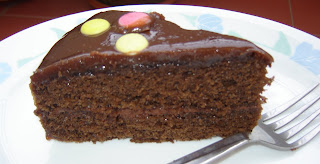
I had substituted 2 tbsp of dark cocoa powder for the flour, and used demerra sugar (dark brown sugar), because of which my cake turned out dark brown in colour, with a nice subtle chocolaty flavour, masked by the distinct banana flavour. Since I did not have spare bananas to decorate on the cake-top, I sprinkled some icing sugar after turning it out. I think the outcome is pretty good (though the cake had cracked a bit on top) - do not go with my pics - am not a very good food photographer:(
I think this cake will go down very well with kids or as a coffee cake. You can increase the cocoa powder quantity, if you want a more chocolaty flavor:) Happy Baking!!

Baked Vegetables and Macaroni

This is for my friend Shobhana who wanted a simple baked pasta recipe - or else I am too lazy to compose a blogpost and publish it:) This was created by reading a few classic "Macaroni and Cheese" recipes and "Baked Vegetables" recipes - I simply married the two.
I have divided this recipe into 3 parts for convenience sake (Shobs, very much like me, is not much of a cook - so this break-up is helpful)

A. The Macaroni - I bought durum-wheat elbow shaped macaroni and boiled around 1 cup of it in salt water till al dente (keep checking while stirring - we dont want it to get too soft, since it will also go through the baking cycle). Then rinse it out with cold water and strain it and keep it aside - you can drizzle a bit of oil to prevent it from sticking).

B. The Vegetables - I chopped around 2 cups of assorted vegetables (red, green and yellow bellpeppers, carrots, french beans, cauliflower or you can use broccoli, button mushrooms and red spanish onions). Separately, I boiled a little bit of sweet corn niblets and green peas in water till just cooked. For cooking the vegetables, in 1 tbsp of olive oil, saute the veggies along with 1 tsp of minced garlic. I added the bellpeppers at the end, since I like them crisp. Mix these veggies with the boiled macaroni and keep aside.

C. The White Sauce (or the bechamel sauce) - In about 1 tbsp of butter or margarine, saute some finely chopped onions (about 1/2 cup). Once the onions have caramelized, add 2 tbsp of all-purpose flour or maida and fry gently till it becomes brown. Take care not to over-brown it since it burns very fast. Then add 2 cups of milk and stir so remove any big lumps of flour. While the sauce simmers, add salt and pepper to your taste and a dash of dry mustard powder and Worchestershire sause. If cholesterol is not an issue for you, crumble some Cheddar cheese in the bubbly sauce. If the sauce becomes too thick, you can add some extra milk.

These 3 things are then simply dumped together to create our dish. Grease a large baking dish (I used a deep porcelain baking dish), and put the veggies-macaroni mixture in it. I've seen cooks who prefer to layer the veggies and macaroni - I was in too much of a hurry to do that:) Then simply pour the thick creamy-cheesy white sauce on top to swamp our colorful vegetables. Sprinkle some bread crumbs on top, along with some grated cheese and decorate with halved cherry tomatoes and olives. Bake the dish uncovered at 200 C for 30 mins. If the crust becomes too brown - you can loosely cover the dish with some aluminium foil.

This healthy and colorful dish is enough for a family of four - myself and hubby had it for lunch as well the next day and we enjoyed every bit of ut:) If you are health conscious, you can simply avoid adding any cheese or alter the amount accordingly.


I would like to read your comment and suggestions on this post. I am not much of a photographer as you can see from these pics, but I am still learning. Also since since this just my 2nd blogpost, I am also learning "blogging":)

Tuesday, May 20, 2008

Heavenly Chocolate custard!


Both me and hubby are chocolate fanatics..you'd find a liberal addition of chocolate in most of the desserts that we prepare. Cakes, gateaux, cookies, custard, puddings, milk shakes, ice-creams or even coffee!!

Last month - when we were enjoying our extended honeymoon since both of us were confined to home - me due to no job and him due to a freak accident leading to heavily plastered hands to heal many broken bones in both his hands, we prepared loads of stuff. Alas! we never bothered to take pics of all or even bothered to take good pics of the few we did - but still, will have to make do with what we have.

Since the docs had adviced him to take milk and milk-products to help his bones heal fast, I came up with this chocolate custard. He is not very fond of milk, and can go to any lengths to avoid it:) I modified this recipe from Nita Mehta's cookbook.
Let me know if anyone is interested in the recipe..

a few somethings that i cooked up in the kitchen ...

I have started this new blog today - my first! I sincerely hope that you all will like stuff that I post on my blog. Firstly, I feel that I should explain (briefly - no worries:)) my intention behind starting on this blog. This is the first time in my life (in the 28 odd years till now) that I have been sitting at home with nothing much to do - recently was diagnosed with quite an acute case of hyperthyroidism only 3-4 months after my marriage:(

Since I have also resigned from my job recently, and not joining anyplace soon - I thought, it would be nice to mention a few of 'the things that i do'.
I have not been much of a cook - since have mostly relied on mum's cooking when at home or else on take-aways when not at home. Only after my marriage in December, have I really started cooking in earnest - and enjoying it too!! I guess, its also something to do with the fact that my husband and myself, both are self-styled foodies and experimental cooks:) I seriously believe that one of the best bargains about marriage is that you finally get a life-long ally..someone who will always be there for you..your confidante..with whom you can plot and plan..and basically create a mess in the kitchen:P

Well..yesterday we decided to make Paneer Tikka Masala on the spur of the moment (reason - we tried our hands at making Vegetable Spring Rolls during the weekend, but they were a complete disaster. So tried doing something simpler yesterday).

The tikkas came out really well...crispy and yummy:) I was too tired to make a gravy for the tikkas, so we used some fresh green chutney (made from fresh green coriander and mint leaves) as an accompaniment. We used the tikkas as a side dish along with our ajwain parathas and masoor tadka. To cut it short - we had a wonderful dinner!:) Just check out the tikkas yourself and try out this simple improvised recipe for quick home cooking.
Paneer Tikka (Cottage Cheese Tikkas)
Ingredients (for marinade):
# 100 gm - thick yoghurt/dahi
# 1 tsp grated fresh ginger
# 1 tsp grated fresh garlic
# 1/2 tsp each of garam masala, red chilli powder, dhania powder, jeera powder.
lemon juice and salt to taste
Method:
1. Cut big pieces of onion, capsicum, tomato and paneer (~ 1 inch sq pieces). Remove seeds from tomato and capsicum before dicing.
2. Wash and pat dry buttin mushrooms (we used small buttons - so they got grilled easily).
3. Mix these veggies in a big bowl with all the marinade (mix tenderly so as not to break the soft cottage cheese squares). Cover the bowl with a cling foil and refrigerate for 12 hours or less. We could only marinate ours for a little over an hour.
4. When its time for grilling - take out the veggies and skewer them gently so as not to break any of the pieces. We grilled the mushrooms on a separate skewer so as to cook them thoroughly.
5. Drizzle a few drops of oil on the veggies and grill them at 200 C for 20-30 mins. Grill time depends entirely on how you want the veggies to turn out - soft and mushy or al-dente and crisp. Serve with green chutney (pulse fresh washed coriander, mint leaves with roasted red tomato - skin charred and removed and 1 clove of garlic).

Your suggestions and comments are most welcome!